Showing posts with label chocolate. Show all posts

Monday, May 22, 2017

Cake Mix Peanut Butter Bars

So yesterday happened, which was a Sunday, and my husband was craving a dessert with peanut butter in it. Specifically, peanut butter bars. The catch? We only had 1 stick of butter. Since we don't go shopping on Sundays I was up for a bit of a challenge in finding something that would satisfy his craving!

But you guys, I did it! And, of course, it's a Six Sisters Stuff recipe. I swear between them and Pioneer Woman they are always saving the day.

I was a little skeptical at the whole cake mix idea of it. I was sure the texture would be way too off to be considered a "bar." The recipe was so dang easy though it was worth it to just go for it and see what happened.

Well, here you have it! Freakin' YUM! I love these things. My husband says that the cake flavor mixed with the peanut butter isn't quite up to his standards, but it satisfied what he was after. I, on the other hand, had zero issue with the cake flavor mixed with the peanut butter! I thought the whole thing was great and we both agreed that the texture was definitely that of a bar!


What you will need:

Bars-

  • 1 box vanilla cake mix
  • 1 egg
  • 1/2 C water
  • 1 C peanut butter
Frosting-
  • 1 stick (1/2 c) butter, softened
  • 1/4 C milk
  • 3 T cocoa powder
  • 1-2 tsp. vanilla (I used 2)
  • 2-3 C powdered sugar (I ended up using 2 1/2)
Directions:

Bars-
  • Preheat oven to 350*
  • Spray a 13x9 baking dish with non stick spray
  • Mix cake mix, egg, water and peanut butter together until mixed well
  • Pour and spread mixture into the 13x9 dish
  • Bake about 20-25 minutes
  • When completely cooled, spread frosting on top
Frosting-
  • Mix all ingredients together until a smooth frosting forms. Add powdered sugar as needed for desired consistency
  • Spread over the top of the peanut butter bars

Friday, April 14, 2017

Chocolate Chip Mug Cookie

This happened because I was scrolling through Pinterest and happened to have chocolate chips on hand. Also, I'm pregnant. As if I could have said no!

A chocolate chip mug cookie? As far as mug desserts go, this one I am sure I will go ahead and make again in the future. I wouldn't say that the cookie part itself offers much flavor, but it sure offered some great substance to eat some melted gooey chocolate chips with. So, when the craving hits, this will be a good one for me.


What you will need:

  • 1 tsp. oil
  • 3 T milk
  • 1/4 tsp. vanilla
  • 3 heaping T brown sugar (not packed)
  • 4 T flour
  • 2 T chocolate chips to mix in
  • 1 T chocolate chips to drop on the top
Directions:
  • Mix together the wet ingredients (oil, milk and vanilla)
  • Add in the brown sugar and mix well
  • Mix in the flour 
  • Mix in the chocolate chips
  • Microwave for 1 minute if you want it nice and gooey, 1 minute and 30 seconds if you'd like it somewhere in the middle and 2 minutes if you want the dough to not be gooey but still a little gooey around the melty chocolate chips.

Wednesday, August 24, 2016

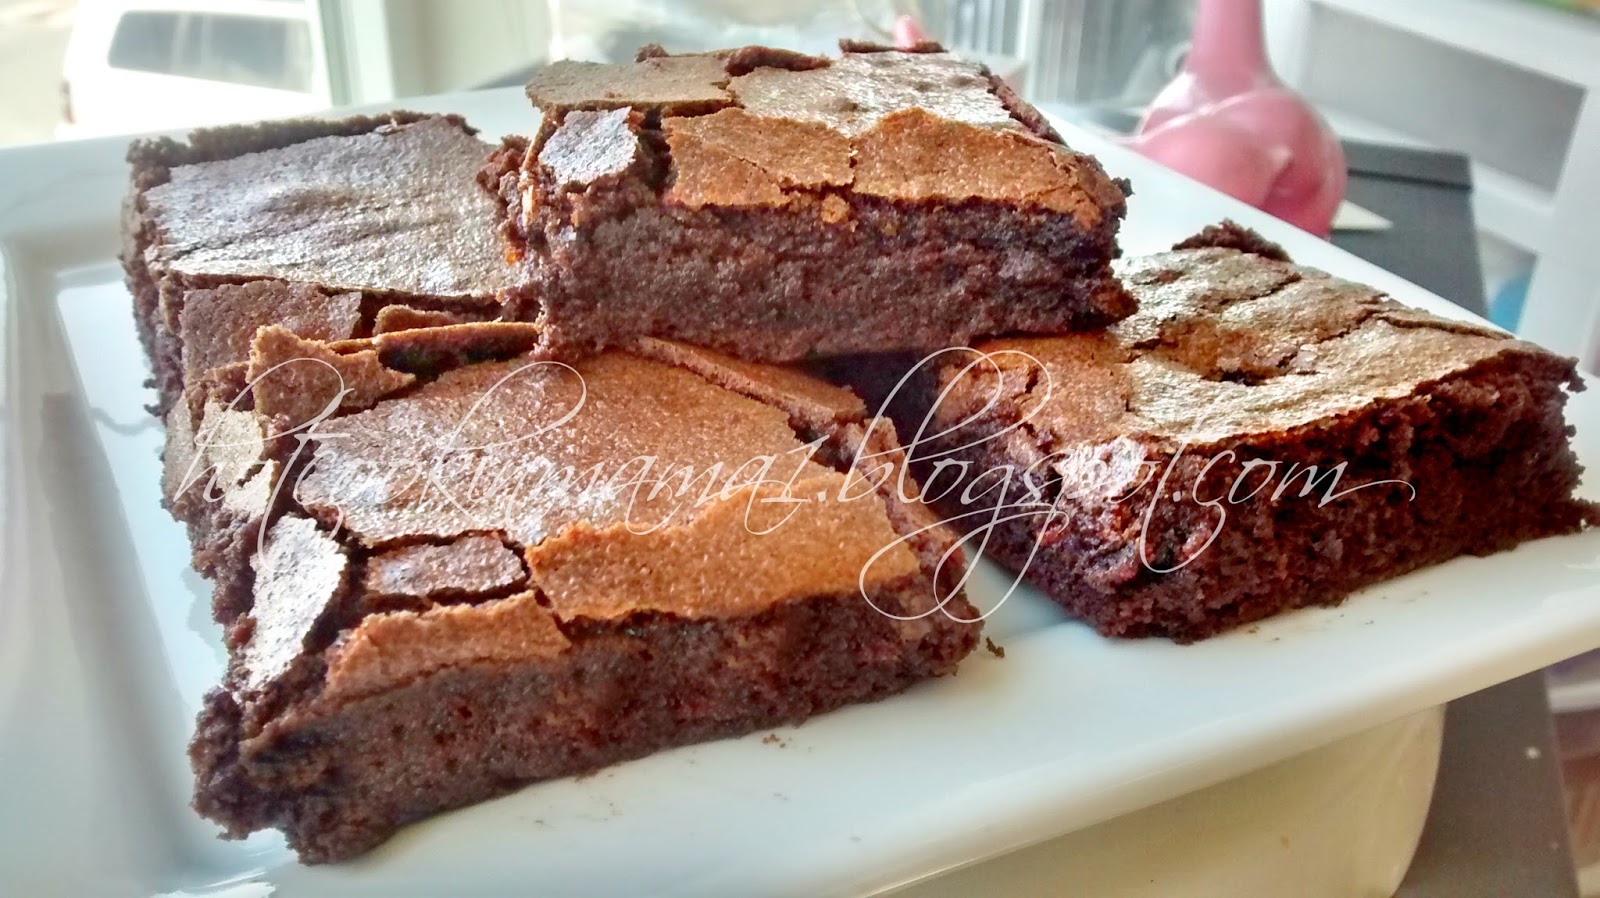
Homemade Brownies


I have a special baker being featured on my blog today! She has had many successes in the baking world, and today she outdid herself by completing a recipe from scratch perfectly. This recipe definitely deserves a spot on the blog! So, let's get to it! Here she is.........

My little 9 year old daughter. 


She has been absolutely obsessed with baking ever since watching the Kids Baking Championship on the Food Network. She vowed to be on the show someday and has been hard at work ever since. We do little baking lessons just here at home. We tackle one recipe a month like so:

1st week: Intro to recipe. Give tips, give help and educate.
2nd week: Review. I'm there to help if needed but stay pretty hands off and quiet otherwise.
3rd week: Test. No help from me in any way shape or form and we just hope for the best! Mistakes are how we learn so we don't sweat it too much :).
4th week: Perfect. Make it again to take to some friends or neighbors. This ensures confidence in skill since it most likely won't be able to be tested before sending them off to someone else.

Well, my kids had only had their intro (walk-through) on brownies when I came down with a pretty crazy sickness that lasted 2 weeks. They decided to lock me in my room to rest while they took on the brownies by themselves without any help. Needless to say, they were amazing! So my daughter got really into the brownie thing and can't stop making them. She tried out this recipe today from the Recipe Rebel and it's a fam favorite now! 

They are exactly what most people want from a brownie. Rich and gooey (but not so gooey that it feels underdone), yet can be held without falling apart. Oh, so delicious!


What you will need:
  • 1 C butter, melted
  • 2 1/2 c white sugar
  • 1 T vanilla
  • 4 eggs
  • 1 1/2 C all purpose flour
  • 1 C cocoa powder
  • 1/2 tsp salt
Directions:
  • Preheat oven to 350*
  • Line a 9x13 baking dish with tin foil and spray with non-stick spray
  • Combine melted butter, sugar and vanilla and mix well
  • Add the eggs one and time, mixing well after each addition
  • Add in the cocoa powder and mix well
  • Add in the flour and salt and mix well
  • Spread batter evenly into baking dish
  • Bake 26-30 minutes (mine took about 32 and my oven cooks things faster than usual)

Thursday, August 4, 2016

Thin Mint Brownie Ice Cream Cake


 I have some pretty big news! Yesterday our family went to Lagoon, and while we were there we wandered around Pioneer Villiage. We came upon a little shop that had a sign saying they sold Swig sugar cookies! I absolutely HAD to get one. I had only ever heard about them (a lot) up until that point. MAN were they good!!!! My husband had to listen to me marvel at how they got it to the perfect sweetness (both the cookie and the frosting) without feeling like it was just a bunch of powdered sugar, or worse, feeling the sugar while you ate it. It was just.....perfection. I turned to my 9 year old and asked if she wanted some.

"No.....I only like your sugar cookies."

Um, what? I tried to convince her that these were like mine but better! She was insistent on the fact that no, she doesn't like any other sugar cookies but mine and just won't even bother trying any others. This was news to me. 

The same thing happened for her birthday dinner. Her favorite food is taco's so I'm thinking okay we can go out for tacos or something. She said NO. "Mom's tacos." She likes mine more than anything.

SAME THING HERE, FOLKS. She wanted an ice cream cake for her birthday but wanted ME to make it. I'll be honest, I'd never made an ice cream cake before. I'd spread some ice cream over an oreo crumble before but the cake addition thing was new for me. 

She absolutely loves mint chocolate chip ice cream (and anything mint really). I spotted our girls scout thin mint cookie brownie mix in the cupboard I'd picked up since I had an Ibotta rebate for it. Why not give it a try?

I'm not sure why I decided to crumble the brownies and press them into a pan. Probably because the instructions say to use an 8x8 or 9x9 pan and I wanted an ice cream cake that was 13x9. So I was able to make a larger ice cream cake with just one box of brownies. The base layer was just a bit thinner than maybe some people would like their cake to be in it. 

I also decided to put the cool whip layer between the ice cream and ganache. In my head I was thinking that the ganache might melt the top part of the ice cream if I put it directly on top of it. But in reality, I'm sure if I'd just dumped it on when it was completely cool it would have been fine? So, do your layers however you'd like! You could even do ice cream as the bottom layer and brownie it up on top! Who cares! Have fun!

What you will need:  
  • 13x9 cake pan
  • 1 box Pillsbury girl scout thin mint cookie brownie mix
  • 1 tub mint chocolate chip ice cream
  • 1 tub cool whip
  • 1 c. heavy cream
  • 8 oz. baking chocolate chopped up (I used German chocolate)
Directions:
  • Bake brownies according to directions
  • When brownies are completely cooled, crumble them up and press them into 13x9 cake pan
  • Place brownie layer in the freezer to firm up a bit
  • Pull out ice cream and cool whip and let it thaw for about 20 minutes so it's spreadable
  • Scoop out all the ice cream onto the brownies and spread evenly
  • Spread cool whip on top of ice cream
  • Freeze again until firm
  • Place chopped up chocolate into a bowl
  • Heat up 1 c of heavy cream until just boiling
  • Pour cream over the chocolate an let it sit for about 5 minutes before stirring
  • Stir gently until well mixed and you have a nice smooth and creamy ganche
  • Either let it cool and spread it over the cool whip, or you can drizzle the top right before serving. Or you can let it cool completely and then whip it up into a frosting. The choice is yours!

Monday, June 6, 2016

PMS Cookies

I spent a little while trying to figure out what to call these cookies. Double Chocolate Nutella....Nutella Chocolate....Chocolately Chocolate Chocolateness. Then I kind of just figured hey, I'll be honest. They're PMS cookies.


I spent a good 20 minutes scrolling through Pinterest trying to find a cookie recipe that I wanted to make after a day of raging irritation at every tiny noise and sight. After a day of feeling so tired and bloated and foggy. I just wanted chocolate. But I wanted nutella. But I wanted them both. But I didn't want any of the recipes I was seeing.

So I stood at my Kitchen-Aid and threw stuff in there. I know the basics of a cookie recipe so I just went for it and hoped it worked out. Oh gosh they freakin' hit the spot! I'm so glad they worked out. And I think my husband is too. Because I was nice again afterwards.


What you will need:
  • 1/2 c butter, softened
  • 1/2 c white sugar
  • 1/4 c brown sugar
  • 1 egg
  • 1 tsp. vanilla
  • 1/2 c nutella (I feel like I could have gone up to 3/4 c to make them a bit more gooey)
  • 1/2 c cocoa powder
  • 1 tsp. baking soda
  • 1 1/2 c flour
  • 1/2 c chocolate chips
Directions:
  • Preheat oven to 375*
  • Mix butter, sugars and egg until light and fluffy
  • Add in the vanilla and nutella and mix in until well combined
  • Add in the cocoa powder and baking soda until well combined
  •  Add in the flour a little at a time until well combined
  • Toss in the chocolate chips and mix until just combined
  • Roll dough (it will be very thick) into balls on a parchment paper lined cookie sheet
  • Bake for 9-11 minutes depending on your oven

Saturday, May 21, 2016

German Chocolate Cake with German Chocolate Frosting

It's called a German Chocolate Cake, but zero German chocolate was used. So what does that make it? Really it's just a good ol' rich chocolate cake with that traditional coconut and pecan frosting. The frosting is CRAZY good. My 5 year old took a spoon to the pan and sat on a bucket in the kitchen scraping off the sides until there was absolutely no trace left.
So, legit German Cake or not, this recipe will be used and used again in our house! Hop over to A Dash of Sanity to check out the background on this amazing cake!

What you will need:
Cake
  • 2 C white sugar
  • 2 C all purpose flour
  • 3/4 c cocoa
  • 2 tsp. baking powder
  • 1 1/2 tsp. baking soda
  • 1 tsp. salt
  • 1 C milk
  • 1/2 C vegetable oil
  • 2 eggs
  • 2 tsp. vanilla extract
  • 1 C boiling water

Frosting
  • 1 C evaporated milk
  • 1 C white sugar
  • 3 egg yolk, beaten with 1 tsp water
  • 1/2 C butter
  • 1 tsp. vanilla extract
  • 1 C chopped pecans
  • 1 C coconut
  • 1 T cornstarch

Directions:
Cake
  • Preheat oven to 350*
  • Grease 2 9x9 round cake pans, 3 8x8 round cake pans, or 1 13x9 cake pan (I just made 2 9x9 cakes)
  • Add all dry cake ingredients into a mixing bowl or Kitchen-Aid and blend well
  • Add all wet ingredients except for boiling water one by one and blend well
  • Add in boiling water little by little until mixed in
  • Blend for about 1 minute after water has been mixed in
  • Pour even amount of cake batter into each cake pan
  • Bake about 30-35 minutes
  • Allow to cool completely

Frosting
  • In a sauce pan, mix evaporated milk and sugar together
  • Add in cornstarch, mix well
  • Add sugar and eggs, blend well
  • Bring to a slow boil
  • Start stirring constantly for 12 minutes while it thickens
  • Add in vanilla and mix in
  • Remove from heat and stir in pecans and coconut
  • Let it cool before frosting

Friday, November 27, 2015

Chocolate Chip Cookies

Wow, a title doesn't get any more simple than that, does it? Chocolate chip cookies. What a wonderful name.

About 4 years ago or so I created my own "perfect" chocolate chip cookie recipe. It was fit for me. It had everything I wanted. Chewy, soft, spread out just right, not too dry, not too fluffy, gooey and buttery golden flavor (yes, "golden" is a flavor).

I hid it in my computer labeled "secret cookie recipe."

And then my computer crashed. We recovered some pictures, but no cookie recipe came along with it. I'd had it memorized for a while and slowly, I started forgetting exactly what it was. I settled for making the recipe on the back of Nestlea Tollhouse packages. They were satisfying enough. But I still longed for my cookie.

Fast forward to today, scrolling through Pinterest and I see a picture of a cookie that looked exactly like mine! I had to try. And boy, I tell you what. These are BETTER than mine! I did add 1tsp of water to the batter and it was just heavenly!

I will not use any other recipe other than this from now on. This is it, you guys! This is perfection! I stared at my nestlea chocolate chips and my guittard chocolate chips trying to decide what to use the first time around. I went with guittard. They're huge. And I wanted chocolate. So these were very, VERY chocolatey. I can't wait to make them again with the regular sized chips now.

The fact that I have no clue where this woman lives and having this recipe work brilliantly in my high altitude desert of a city says a lot to me. It's gotta be fool proof!

Here's my picture. But I promise you, the pictures of the cookies on her post is what makes it and does them justice. RUN to her page at Gimme Some Oven so you can see what you can really expect with these! Maybe I'll update my photo once I don't have these huge honkin' chocolate chips all over. Maybe.


What you will need:
  • 1/2 C butter, softened
  • 1/2 C brown sugar
  • 1/3 C white sugar
  • 2 tsp. vanilla
  • 1 egg
  • 1 1/2 C flour
  • 2 tsp corn starch
  • 1 tsp baking soda
  • 1 C chocolate chips (+ some to stick on the tops right before they go in the oven)
  • Parchment paper (optional, but it does make a difference!)
Directions:
  • Cream the butter and sugar until light and fluffy
  • Add in the vanilla and egg and mix until well blended
  • Slowly add in the flour, corn starch and baking soda until well combined
  • Toss in the chocolate chips and mix it all up
  • Refrigerate the dough about 20 minutes (I didn't........so I guess you can see the difference!)
  • Preheat the oven to 350*
  • Lay some parchment paper over a baking sheet
  • Roll the dough into balls, or scoop them using a cookie scoop (I scooped with a cookie scoop and then rolled them into a ball)
  • Place each ball onto the baking sheet and stick a few extra chocolate chips on the tops of 'em
  • Bake for 10 minutes
  • Pull them out and let them finish cooking a bit on the sheet
  • EAT. RIGHT AWAY.