Showing posts with label kids. Show all posts

Wednesday, August 29, 2018

Roasted Vegetable Soup

This is absolutely perfect for Fall! My girls and I created our own holiday years ago. It's on October 1st and we make pumpkin chocolate chip cookies, decorate the house for Halloween with Halloween music, go shopping for Halloween costumes, have soup for dinner and watch a Halloween movie with hot chocolate. Since we're in Idaho we get all 4 seasons and it is GORGEOUS here! We soak it up like you would not believe. The girls get more excited for this holiday than Christmas. It's absolutely hilarious.

Anyways, this soup just might be a strong possibility for soup of choice on our holiday! That's saying something, because they take it seriously and everything has to be perfect.

The original recipe doesn't call for tortellini pasta, but my kids have bottomless stomachs so I threw in a little more substance.

Recipe adapted from: Roasted Vegetable Soup- Pioneer Woman

What you will need:
  • 1 large zucchini, sliced in half and then cut in half moons
  • 1 yellow squash, sliced in half and then cut in half moons
  • 1 yellow onion, sliced
  • 1 red and yellow Bell pepper, cut in strips
  • 3 garlic cloves, minced
  • 1/4 c Olive oil
  • 1 T Italian seasoning
  • 1/2 T salt
  • 1/2 T pepper
  • 4 c chicken stock (or vegetable stock)
  • 14 oz can stewed tomatoes
  • 1 Bay leaf
  • 1 c heavy cream
Directions:
  • Preheat oven to 475*
  • Spray baking sheet with nonstick spray
  • Combine all veggies into a large bowl with olive oil and seasonings to toss to chat
  • Arrange vegetables on baking sheet in an even layer and roast for 15 minutes
  • Add vegetables into crock pot with stewed tomatoes, chicken stock, heavy cream and Bay leaf
  • Cook on low for 3 hours
  • Remove Bay leaf and blend soup until it's reached desired texture

Friday, August 10, 2018

12 Mommy Daughter Dates

Last year I was trying to think of a good gift for my girls for Christmas. They really love quality time so when I found Shopkins Live tickets for a few months later I thought it would be awesome! A few months prior, though, I'd taken them each on a fun Mommy Daughter date to soak in the time together before their baby sister made her arrival. We had SO MUCH FUN and they talked about it for weeks. So I came up with giving them a years worth of Mommy Daughter Dates!


This picture should really start with a January envelope, but...I didn't take one of them before I gave them to my girls so...

I really loved the idea of giving this to them at Christmas time, because after you've done all your Christmas activities, Santa shopping, regular shopping and funding all the goodies, it feels like your money is in your hands for approximately 2 seconds before it's flying away again! I didn't have to pay for all of these dates up front! HA!

My goal was to spend around $10 on each date, but many of them are free. The real goal was to just spend time together one on one. I learned very fast that they didn't mind that at all! They didn't think about not "getting things" because they were just thrilled as heck to be hanging out with me (something that won't be usual in just a few short years). Since they each got a date every month, that put it to around $20 a month, which I felt was highly worth it, but you can customize however you want!

I kept the Shopkins Live idea for Febuary and decided to do a combined Girls Night Out twice in the year where we all do something together as girls. They just opened their 2nd Girls Night Out date which was our date for August.

As far as putting these together, it's incredibly simple! I found some fun multi-colored envelopes at Walmart...

And I designed each date on the computer to print off on cardstock to stick in the envelopes. You can honestly just chop papers up into squares and write the dates with a Sharpie if you want! The effect will be the same. They open theirs on the Sunday before a new month starts and we plan when we'll do it. They usually get excited and want it right at the first of the month. But for things like this one in September, it's best to wait until the end of the month!

Here is the list of dates I made for the year. A lot of the dates I did the same each month for both girls. But sometimes I'd use the same date idea, but put them in different months for them because their personalities called for it. And some are different for each girl that month because the other girl wouldn't be interested in the other date. Does that make sense?

Basically, just look at your months and what your girls like to do during those months and what they like to do in general and just go for it. Things like Starbucks I wouldn't put in the dead of summer and I wouldn't take one of my girls to Bath & Body Works because she doesn't care for it like the other does. They both like Great Harvest but one would love it in the winter more.

$10 at Deseret Book +
Pick out Florences Chocolates

Girls Night Out!: Shopkins Live!

Movie Night 
(Kick the family out for an at-home movie night with treats or go out to the theatre with a few treats smuggled it heh-heh..)

Lunch at Great Harvest

$10 to Claires+
Cookie Place

$10 to Bath and Body Works
(Try on all the fun scrubs and lotions!)

$10 to Ulta
(Try on all the fun makeup!)

$10 to Hobby Lobby +
Lemonade
(We love Chick-fil-A lemonade and use our app to get it curbside! Not gonna lie we also ordered a chocolate chunk cookie)

Prepared Pantry & Baking the goods we picked out

Soda Tsunami
(Or any fun soda shop)

Scooter date!
(We scootered to our local Icy shack but you can go anywhere!)

Girls Night Out!: Dress up and go out to dinner with an at-home spa night afterwards

Fall bike ride & picnic

Starbucks date & Christmas Shopping

$10 to Barnes & Noble

Monday, May 22, 2017

Cake Mix Peanut Butter Bars

So yesterday happened, which was a Sunday, and my husband was craving a dessert with peanut butter in it. Specifically, peanut butter bars. The catch? We only had 1 stick of butter. Since we don't go shopping on Sundays I was up for a bit of a challenge in finding something that would satisfy his craving!

But you guys, I did it! And, of course, it's a Six Sisters Stuff recipe. I swear between them and Pioneer Woman they are always saving the day.

I was a little skeptical at the whole cake mix idea of it. I was sure the texture would be way too off to be considered a "bar." The recipe was so dang easy though it was worth it to just go for it and see what happened.

Well, here you have it! Freakin' YUM! I love these things. My husband says that the cake flavor mixed with the peanut butter isn't quite up to his standards, but it satisfied what he was after. I, on the other hand, had zero issue with the cake flavor mixed with the peanut butter! I thought the whole thing was great and we both agreed that the texture was definitely that of a bar!


What you will need:

Bars-

  • 1 box vanilla cake mix
  • 1 egg
  • 1/2 C water
  • 1 C peanut butter
Frosting-
  • 1 stick (1/2 c) butter, softened
  • 1/4 C milk
  • 3 T cocoa powder
  • 1-2 tsp. vanilla (I used 2)
  • 2-3 C powdered sugar (I ended up using 2 1/2)
Directions:

Bars-
  • Preheat oven to 350*
  • Spray a 13x9 baking dish with non stick spray
  • Mix cake mix, egg, water and peanut butter together until mixed well
  • Pour and spread mixture into the 13x9 dish
  • Bake about 20-25 minutes
  • When completely cooled, spread frosting on top
Frosting-
  • Mix all ingredients together until a smooth frosting forms. Add powdered sugar as needed for desired consistency
  • Spread over the top of the peanut butter bars

Friday, April 14, 2017

Easy Baked Chicken Taco's

I can't believe I don't already have these on here! This is seriously a family favorite, and considering that it's a sneaky way to make my kids eat tomatoes and onions, it's a big time personal favorite, too! It calls for a diced onion and a can of diced tomatoes. What I do is toss them in a blender until they make a sauce together and toss the shredded chicken with it. You can do it however you want, though!


What you will need:

  • 1 pkg. taco seasoning of your choice
  • 3-4 chicken breasts, cooked and shredded
  • Mexican shredded cheese blend
  • 1 onion, diced
  • 1 can diced tomatoes
  • Hard taco shells
  • Topics of your choice
Directions:
  • When your chicken is cooked and shredded, add the taco seasoning in and mix well
  • Preheat oven to 350*
  • Either add the diced tomatoes and onion to the chicken and mix, or blend them in a blender until it makes a sauce or chunky texture to mix in with the chicken
  • Fill the taco shells with the chicken
  • Top with the shredded cheese
  • Bake at 350* for about 10 minutes or until cheese is melted
  • Top with favorite taco topics

Friday, October 28, 2016

Pretzel Bites

Okay these pretzels from The Slow Roasted Italian are the BOMB! They were unbelievably easy to make but have the quality of "mall pretzel bites.......but BETTER!" (as said by my kids) They don't feel or taste like you just cut up some dough and put them in the oven. They are amazing! My only regret is that I only made one batch. It was enough for our family of 4 ( and a half if you count the little guy who hate maybe 3 and then focused on his chips), but we all were kind of sad that they were gone so I would have loved to have some leftovers! Oh, the best part? You don't need to wait for the dough to rise.

I read a few recipes for pretzel bites and read through comments. I saw a lot of people complaining of their second or third batches coming out with a really bitter taste to them. Everyone seemed to conclude that it must have been because they put their pretzel bites into the baking soda bath, baked them in the oven, and then put the next round of pretzel bites into the baking soda bath (rather than having all of the bites in the baking soda bath without long waiting times between more being added into the bath).

So, in my directions I have you getting all of your pretzel bites in and out of the baking soda bath before you bake any of the them. They all turned out great, so who knows if waiting to put in other batches later on causes a bitter taste.


What you will need:

  • 2 1/4 tsp. active dry yeast
  • 1 1/4 C warm milk (110*-120*)
  • 2 T honey or sugar
  • 3 1/4 C flour
  • 1 tsp. salt
  • 1/2 C baking soda
  • 8 quart pot of water
  • 1 egg, beaten with 2 tsp. cold water
Directions:
  • Preheat oven to 450*
  • Warm your milk up and pour into the bowl of a stand mixer
  • Sprinkle the yeast into the milk
  • Add the sugar to feed the yeast
  • Let the yeast get nice and foamy, about ten minutes
  • Once the yeast is ready, add in the salt and mix together with the paddle attachment
  • Add in the flour, one cup at a time. You want the dough to be tacky but not sticky. (I ended up with 3 cups and 3 tablespoons)
  • Once your dough is ready, replace the paddle attachment with a dough hook and knead for about 3 minutes
  • While that's kneading, spray your counter top lightly with some non stick spray. Using flour will make the dough too difficult to work with
  • Turn your dough out onto the counter and divide (I just used a pizza cutter) into quarters. 
  • Start boiling your 8 quart pot of water
  • Line a baking sheet with parchment paper and spray with non stick spray, set aside.
  • Beat one egg with 2 tsp cold water, set aside
  • Grab one of the dough quarters and divide that piece into 4 more pieces
  • Roll out each of those 4 pieces gently until you can cut at least 4 pretzel bite size pieces from it
  • Continue on with the rest of the dough, you should end up with at least 64 pretzel bites
  • Carefully add the baking soda into the boiling water
  • Dump a bunch of the pretzel bites into the boiling water and let it sit for about 20 seconds
  • Remove with a spatula or slotted spoon of some kind and place onto the baking sheet
  • Do this with all of the pretzel bites until they have all been in the baking soda bath 
  • Brush pretzel bites with egg wash and add kosher salt
  • Bake for about 15 minutes (mine were done after 10)

Tuesday, October 11, 2016

Explaining Santa's Gifts

We're approaching the big holiday season. Already. I'm still trying to get a nap in from last years Christmas. But, ready or not, it's coming. Are you prepared?! Your kids are older this year, and just might give you a run for your money with the Santa questions.

Every Christmas, we see parents all over trying to teach their kids the importance of giving, service and kindness. We see them doing their best to add a child in need to their Christmas list to be a good example. We bake cookies for neighbors, we drop off a turkey anonymously to a family's doorstep that we know is struggling financially.

But, when a child asks, "why doesn't Santa go to the homeless shelter?" Or, "why can't I ask for this $500 gift from Santa?" what do we say? That Santa picks and chooses which kids to visit, and that he also has a budget? Santa has RULES? Where's the fun in that?!


While there are plenty of great churchy and inspiring ways to deal with things like this where you can sit down with your children and give a lengthy and perfectly worded explanation, sometimes you need just a few words to get your point across. The best words I've ever heard someone say to their kids when these questions started popping up was,..

"Yeah, Santa brings the gifts, but Mom and Dad still have to pay for it."

I know there are many families out there who don't do the Santa thing, and that's okay. Every family is different, so if you're a family who cherishes those few years where your kids still believe in Santa and you don't want to break down saying, "Santa isn't real" when they ask the tough questions, this might be what you're looking for! These few words allow the magic of Santa to continue on while allowing some reality to the situation to be factored in. 

Children can grasp the ideas of some families having a larger budget than others. That's life, and they're typically already aware of it before anyone ever actually brings it up to them. Simply stating that Mom's and Dad's are still in charge of paying for their Christmas even when Santa and his helpers do all the work connects so many dots for them!

A family in need is still a family in need, even when Santa is involved. A $500 toy is still a $500 toy, even when Santa is involved. This answer might not be what you were looking for or work for your kids. If not, that's okay. There are plenty of other ways you can talk to your kids about these things. But for our family, it has worked great! 

Monday, September 26, 2016

5 Ways to Help Your Kids Feel the Spirit on the Sabbath


Sunday mornings with kids. Kids on Sunday mornings. Mornings with kids.....on Sundays. How many different ways can I say that before you develop a twitch? Sunday mornings with kids is probably rated a zero on a scale of 1 to 10. Why? Because Satan don't want no church goers!

I'm kidding (I'm not, but you know what I mean). Sunday mornings just have a way of getting a little out of hand most weeks. Are you grouchy by the time you all finally get loaded into the car? Maybe a little stressed out or frazzled? Chances are, if that's how you're feeling, your kids are feeling it, too. At the very least, they aren't feeling excited or wanting to go.

So, how can we fix that? Kids typically see church as a to-do. If we're being honest, we all feel that way a lot of the time, too. We show up, sit through it or teach it and get out of there. Our kids, much like school, show up and sit through it so they can get out of there.

Teaching them to find how to enjoy church or feel the spirit can be tricky. However, kids deserve more credit. They are often very sensitive to the spirit and very capable of seeing the importance of a lesson. We just need to provide and encourage those moments for them as often as we can. If we are willing to find just a few things to tweak for our Sundays, we are acknowledging that our children deserve and have the capacity to feel and grow just as we do.

Here are 5 ways that you can help your kids feel the spirit on the sabbath.

1. The Friend
You know the song! Saturday is a special day.....Keeping the space around you tidy does help you feel the spirit, and with kids it's no different! Making sure their room is clean with their church clothes out each Saturday is so helpful! 

In addition, I send my kids to bed with the Friend magazine on Saturday nights. I pick out a couple of stories for them to read or activity to do and I try to base it on what their primary class or sharing time lesson will be about the next day. They are able to start shifting their focus to Christ in their cozy clean rooms with their church clothes in view.

This small change has had a huge effect on how my kids feel the next morning. It helps set their mood before they even wake up Sunday morning. They are able to fall asleep the night before feeling peaceful and "in the zone" ;).

 2. Gospel Centered Music
With how many electronic devices we have these days, there are so many ways to access this kind of music. I set my Ipad out in the living room with the Mormon Tabernacle Choir channel on Pandora. It's the first thing my kids hear when they get out of bed each Sunday morning. Singing along, humming along and simply having the music fill our home gives an immediate and lasting feeling throughout the day.

As we know, music has such power to lift us up and feel the spirit. Doctrine and Covenants shares with us:
  
"For my soul delighteth in the song of the heart; yea the song of the righteous is a prayer unto me and it shall be answered by a blessings upon their heads." (D&C 25:12)

 Wholesome and uplifting music can have a great impact on how we feel on and about our Sundays. Joseph F. Smith gave a wonderful thought as he addressed the choir; 

"When we listen to this choir . . . we listen to music, and music is truth. Good music is gracious praise of God. It is delightsome to the ear, and it is one of our most acceptable methods of worshipping God.. ...My soul is always lifted up and my spirit cheered and comforted when I hear good music. I rejoice in it very much indeed." (Joseph F. Smith CR1899Oct:69)

3. Church Activities Jar
You've probably seen this idea floating around on Pinterest at one time or another. But actually taking the time to put one together takes some effort. Each Saturday night I pull out the activities jar and set it on the kitchen table. It's one of the first things they see on Sunday morning! It's just a good reminder that they won't be doing their regular day activities, but that they have other options that are fun to choose from so they don't get discouraged.

I looked at a few lists of ideas and picked the ones I thought were realistic for our family and threw in a few ideas of my own. Then it's just a matter of printing them off, cutting them out and sticking them in a jar! It doesn't have to be fancy and you can even just scribble them down on slips of paper instead of printing them all out.

Our rules are that whatever they choose, they have to do it for at least 15 minutes (and they can't put it back to re-pick). This keeps them from going for the jar simply because they know "bake a treat" is in there. They have to be willing to pick even knowing that some kind of service or their dreaded "go for a drive" is in there, too :). 

This change has really been a fun one for our family. I've seen my kids end up doing things they should but usually don't do on Sundays (like call Grandma and Grandpa!). 

4. Media
This is somewhat of a debate for church goers. Do we watch TV on Sundays? Do we not? What if it's a Disney show? That's not what I'm here to talk about. Every family is different and what is right for you is right for you!

But, if you're looking for a change, or simply something to add in to your Sundays media-wise that can help your kids feel the spirit, youtube is the best!

For us, we decided we didn't really want the TV on Sundays. Not for the regular day to day shows, anyway. So, I created my own playlist on youtube with video's I felt were appropriate and I chromecast it to the TV in our bedroom. It has a mixture of Mormon Messages that I think the kids will like, some gospel songs that have interesting videos with them, or even talks from General Conference that have video's with them I've found to be really awesome! You can check out my own playlist right here or you can make your own!

I've really loved having that on and playing in the bedroom. With the church music out in the living room and kitchen area, the sound from the videos in my room will flow out into the hallway and suck the kids in :). I'll find my kids in there watching for a while and they'll come and go. Even my almost 2 year old sits on my bed and watches intently.  As many great gospel centered videos that there are, I did sneak in Let it Go by Alex Boye  ;).


5. FHE
Family Home Evening can be hard to be consistent with! Coming up with a lesson, rounding up the kids and getting them to sit quietly, all of that can be a bit much to look forward to in the day when you've already reached your limits at 10am :). 

What I've done to keep things simple and also help them feel the spirit each Sunday, is plan my FHE lessons along with the Sharing time lessons. Whatever sharing time lesson is coming up the next Sunday, that's the lesson we will have for FHE. This is a bit easy for me since I teach sharing time once a month and I have access to the lesson outlines. The sharing time outline book is available online to download if you're interested.

This gets them thinking about the particular topic at the beginning of the week in order for them to apply it in their daily lives. It also helps them on Sundays when sharing time begins because they can contribute with thoughts and experiences from their week. Seeing how learning that lesson and spending time thinking about it fits into their lives opens the door for them to feel the spirit as they share those things on Sunday. 

Plus, we all know how kids loooove to know the answers to questions ;). 

So there you have it! There are clearly many many more ways and ideas and I would love for you to share any ideas you have as well! I am definitely not perfect at doing all of these things all the time, but I cannot deny the changes that they have made with the over all impact. 

I encourage you to give one or two of these a try that you haven't done before and let me know how it goes!

Wednesday, August 24, 2016

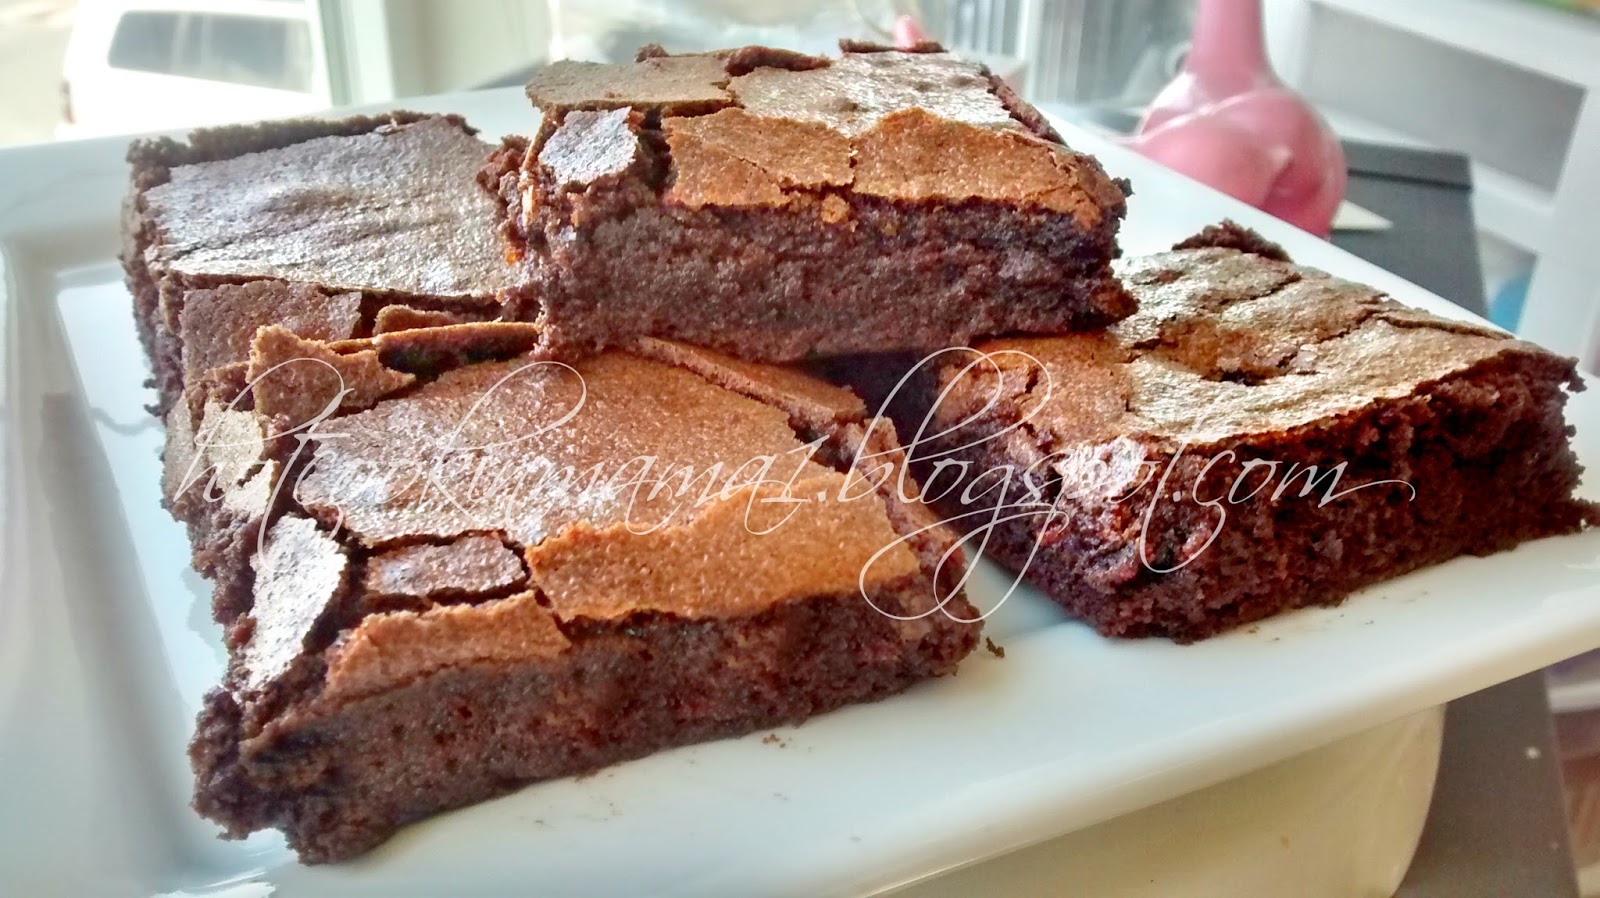
Homemade Brownies


I have a special baker being featured on my blog today! She has had many successes in the baking world, and today she outdid herself by completing a recipe from scratch perfectly. This recipe definitely deserves a spot on the blog! So, let's get to it! Here she is.........

My little 9 year old daughter. 


She has been absolutely obsessed with baking ever since watching the Kids Baking Championship on the Food Network. She vowed to be on the show someday and has been hard at work ever since. We do little baking lessons just here at home. We tackle one recipe a month like so:

1st week: Intro to recipe. Give tips, give help and educate.
2nd week: Review. I'm there to help if needed but stay pretty hands off and quiet otherwise.
3rd week: Test. No help from me in any way shape or form and we just hope for the best! Mistakes are how we learn so we don't sweat it too much :).
4th week: Perfect. Make it again to take to some friends or neighbors. This ensures confidence in skill since it most likely won't be able to be tested before sending them off to someone else.

Well, my kids had only had their intro (walk-through) on brownies when I came down with a pretty crazy sickness that lasted 2 weeks. They decided to lock me in my room to rest while they took on the brownies by themselves without any help. Needless to say, they were amazing! So my daughter got really into the brownie thing and can't stop making them. She tried out this recipe today from the Recipe Rebel and it's a fam favorite now! 

They are exactly what most people want from a brownie. Rich and gooey (but not so gooey that it feels underdone), yet can be held without falling apart. Oh, so delicious!


What you will need:
  • 1 C butter, melted
  • 2 1/2 c white sugar
  • 1 T vanilla
  • 4 eggs
  • 1 1/2 C all purpose flour
  • 1 C cocoa powder
  • 1/2 tsp salt
Directions:
  • Preheat oven to 350*
  • Line a 9x13 baking dish with tin foil and spray with non-stick spray
  • Combine melted butter, sugar and vanilla and mix well
  • Add the eggs one and time, mixing well after each addition
  • Add in the cocoa powder and mix well
  • Add in the flour and salt and mix well
  • Spread batter evenly into baking dish
  • Bake 26-30 minutes (mine took about 32 and my oven cooks things faster than usual)

Monday, June 6, 2016

PMS Cookies

I spent a little while trying to figure out what to call these cookies. Double Chocolate Nutella....Nutella Chocolate....Chocolately Chocolate Chocolateness. Then I kind of just figured hey, I'll be honest. They're PMS cookies.


I spent a good 20 minutes scrolling through Pinterest trying to find a cookie recipe that I wanted to make after a day of raging irritation at every tiny noise and sight. After a day of feeling so tired and bloated and foggy. I just wanted chocolate. But I wanted nutella. But I wanted them both. But I didn't want any of the recipes I was seeing.

So I stood at my Kitchen-Aid and threw stuff in there. I know the basics of a cookie recipe so I just went for it and hoped it worked out. Oh gosh they freakin' hit the spot! I'm so glad they worked out. And I think my husband is too. Because I was nice again afterwards.


What you will need:
  • 1/2 c butter, softened
  • 1/2 c white sugar
  • 1/4 c brown sugar
  • 1 egg
  • 1 tsp. vanilla
  • 1/2 c nutella (I feel like I could have gone up to 3/4 c to make them a bit more gooey)
  • 1/2 c cocoa powder
  • 1 tsp. baking soda
  • 1 1/2 c flour
  • 1/2 c chocolate chips
Directions:
  • Preheat oven to 375*
  • Mix butter, sugars and egg until light and fluffy
  • Add in the vanilla and nutella and mix in until well combined
  • Add in the cocoa powder and baking soda until well combined
  •  Add in the flour a little at a time until well combined
  • Toss in the chocolate chips and mix until just combined
  • Roll dough (it will be very thick) into balls on a parchment paper lined cookie sheet
  • Bake for 9-11 minutes depending on your oven

Wednesday, May 25, 2016

Mini Pizza Pops

So these were originally Mini Deep Dish Pizza's using muffin tins, but I didn't love the idea of my kids biting into a cup of pizza sauce. So we made them like this and called them pizza pops cause they could just pop'em in their mouth.

Their texture is perfect! They crisp up nicely on the bottom and kind of curl up a tad around the edges. Needless to say my kids went crazy for them! Using just 1 tortilla, I got 12 mini's out of it so each of my girls got to make 6. It was the perfect after school snack. It actually filled them up enough and I didn't hear any requests for snacks before dinner! That's pretty darn huge ;).


What you will need: 
  • Tortilla's
  • Pizza sauce
  • Mozzerella cheese
  • Mini pepperoni's
  • Any other pizza toppings you like
Directions:
  • Preheat oven to 425*
  • Cut circles out of a tortilla, whatever size you like, though the mini's are pretty darn cute
  • Add your pizza sauce, cheese and toppings
  • Lay mini's down on a parchment paper lined baking sheet
  • Bake for about 10 minutes 

Tuesday, May 24, 2016

3 Ingredient Homemade Cheeze-Its

This week I decided not to refill the kids "snack box." They get to pick out one after school every day, but the choices were things like cookies, chips and, you guessed it, cheeze-its.

So I got all ambitious this week and was like hey, surely I can come up with snack box level deliciousness that won't cost my kids health quite so much. I stumbled on these homemade cheeze-its and thought well, at least these aren't going to be packed with over 20 crap ingredients.

The very best part about these? My kids LOVED them! My husband said they taste exactly like Cheeze It's....just....fresher. You're basically just eating baked cheese :). I call this a 3 ingredient recipe, but technically there's 4 if you count the 2 T water.....so...sorry I lied to you.

A few notes about this recipe:

On a scale of 1-10, the crunch/crispy factor was at about 7 with my first batch (I purposely baked small batches so I could do test runs first and not ruin them all at once). I made sure my cheese and butter were both room temperature so I thought about other ways to get them crispier. I tried rolling out the dough even thinner and baked them for about 10 minutes longer than the recipe says. (That was weird, considering that I usually have to cut my cooking time for most recipes with how my oven is). I also turned on the broiler for a minute at the end and I think that kicked up the score to a 9.

After using the 2 T of water like the recipe said, the mixture still looked dry and crumbly in the food processor. I decided to feel it and see how it was doing. It was PERFECT! So, make sure you feel the dough after the initial 2 T, you should be able to mold it all together into a smooth ball. It was a lot like play-dough. Hey.....a play dough recipe I won't panic if my 1 1/2 year old eats! Wahoo!

There was no specifics on how long to chill the dough. I stuck mine in the freezer for about 10 minutes the first time (remember that was the batch that resulted in a 7 on the crispy scale). So I left the dough in the freezer about 20 minutes the next couple times around. I think that helped!

I added some kosher salt to the crackers right before I put them in the oven on my last two batches. the first batch wasn't salty enough for me even with the original recipe calling for 1 tsp. salt. So I would just skip that part and add crunchy salt to the tops instead (but I have an insane salt tooth so judge it for yourself!)

All in all, make sure you're rolling the dough out thin enough and chilling the dough long enough and these will be perfection!


What you will need:
  • 8 oz. sharp cheddar cheese, room temp.
  • 1 C all purpose flour
  • 4 T butter, room temp
  • 1 tsp. salt (optional)
  • 2 T ice water
Directions:
  • Add grated cheese, flour, butter and optional salt into a food processor and pulse until it's blended into a fine crumbly mixture
  • Add in the water and blend until dough starts to pull away from the sides of the processor (will probably still look crumbly, but FEEL IT for a playdough-like consistency first before adding more water) 
  • Preheat oven to 350*
  • Shape dough into a ball and chill in plastic wrap until dough is more firm (keeping mine in the freezer for about 20 minutes I think gave me the best results)
  • Roll the dough to 1/8" thick and slice with a pizza cutter into little squares
  • Use a toothhpick or skewer to poke holes into the middles
  • Add salt if desired
  • Bake for about 15 minutes and check every 5 minutes after that until they are desired crispiness

Sunday, November 1, 2015

Kiss Pies

So I tried to make some pie pops a couple weeks ago. It turned into a complete disaster. I was frazzled the entire time. I was suppose to make my pecan pie filling mixture, but went along not realizing I was making my 6 minutes caramels mixture. Once I realized that (and noticing the time crunch I was in), I was just a mess doing two things at once and didn't use my head at all!

That being said, I had some extra pie crust that needed to be used and just happened to scroll past this recipe from the Picky Palate that looked easy and perfect to do with my kids!

You can totally leave them plain but we definitely wanted to dust with some powdered sugar and drizzle with a chocolate/butterscotch drizzle for an extra bit of deliciousness. These would be adorable on everyone's plate at the Thanksgiving table.


What you will need:
  • One roll of refrigerated pie crust rolled out pretty thin
  • Hershey kisses
  • Circular cookie cutter or a knife to cut a circle around each hershey kiss
  • egg wash mixture
  • Sugar
  • 1/2 C Chocolate chips (optional)
  • 1/4 C Butterscotch chips (optional)
  • Powdered sugar (optional)
Directions:
  • Preheat oven to 350*
  • Roll out the pie crust
  • Place a Hershey kiss on the crust and cut a circle around the kiss
  • Bring two ends of the dough together and pinch
  • Bring the other two ends of the dough together and pinch
  • Pinch each side
  • Place them all on a baking sheet
  • Brush them with some egg wash
  • Sprinkle sugar on top
  • Bake for about 23 minutes
  • Let them cool while you melt chocolate & butterscotch
  • Drizzle with the chocolate
  • Dust with powdered sugar

Saturday, September 5, 2015

Fresh Peach Ice Cream

Ice cream for breakfast?! Yes you can!

A little while back we stopped at the local fruit stand and grabbed a bazillion peaches. We went through those peaches SO FAST. Our family can't get enough. My husband and I crave late night bowls of cubed up peaches on the couch while we snuggle up to a movie. We choose it over brownies or other junk food when it's around. Which we find pretty weird.

We had a big bag that we froze also so we could pull some out for smoothies and such. Today we were all sick with the cold and it's been so windy and yucky outside we've all been curled up in blankets all day staying warm.

I opened the freezer to see if I could find a snack. I saw the frozen peaches and remembered the banana ice cream my kids loved a long time ago. I thought I'd give it a try with the peaches! The banana ice cream uses a little peanut butter if you want so it can get a nice creamy texture. I figured I'd just use some yogurt for the peaches.

I have to warm you, you need to be patient with this haha. It took me a good 5 minutes or so to pulse the peaches to the point of an ice cream consistency and about 2 T of yogurt. But let me tell ya, when it was done, my kids when NUTS over it! And hello, it literally is healthy for them. I have zero complaints about this!


What you will need
  • Frozen peaches, whatever amount you want. I probably had 2 C of large sliced peaches
  • 2 T yogurt or more (be patient with your pulsing and you won't have to add much in)
Directions
  • Add your peaches to a food processor or a good blender
  • drop 1 T of yogurt in and pulse for a bit
  • Scrape the frozen crumbles off the sides and pulse some more
  • Repeat a bunch of times
  • Add another T of yogurt and pulse until it's done! Just keep scraping the sides and you'll be able to tell if the consistency is getting there!

Monday, August 17, 2015

Sugar Cookie Bars

Happy MONDAY, everyone! 
The day you're starting your diet. 
The day I'm going to ruin your diet.  
It's really okay, though, honestly.
You can start your diet tomorrow. 
Or next Monday. 
Or whenever you won't be eating these sugar cookie bars still. 
I love sugar cookies.
Doesn't everyone love sugar cookies?
I don't love the hours long process of making sugar cookies.
Am I alone in that one? I can't be. 
I can't be.
So you'll love this, too! 

Basically you're making a sugar cookie dough and smooshing the heck out of it all over a baking sheet and baking it before slathering the top with frosting. I mean it's perfect, it really is. You get the "aww cute" factor with the "mmm yummy" factor you want with sugar cookies but in about 20 minutes instead of a few hours!

Observe.

Awwww CUTE!!!
Mmmm...yummy...

What you will need:

Sugar Cookie dough
  • 1 C butter, softened
  • 2 C sugar
  • 4 eggs
  • 2 tsp. vanilla
  • 1 tsp. baking soda
  • 1 tsp. salt
  • 4 3/4 C flour
Buttercream frosting
  • 1/2 butter, softened
  • 2 tsp. vanilla
  • 3-4 T milk
  • 3-4 C powdered sugar, depending on your texture preference
  • Food coloring, of course
  • Sprinkles, OF COURSE
Directions:

Sugar Cookie Dough
  • Preheat oven to 375*
  • Cream the butter and sugar together
  • Add the eggs in one by one and mix
  • Add in the vanilla
  • Add in the baking soda and salt
  • Add in the flour a cup at a time and mix together
  • Plop the dough into a greased baking sheet (18x13x1)
  • Smoosh the dough out so it's a nice and even layer in the baking sheet
  • Bake for 10-12 minutes
  • Let it cool and frost
Buttercream frosting
  • Mix all ingredients together and add food coloring of your choice! 

Tuesday, July 28, 2015

Funfetti Dip

Well this is just about the easiest thing you can throw together I tell ya what!

This is also not a cream cheese version of this dip, but I didn't feel like it was missing it. The texture reminds me of marshmallow creme a little, though. So I'm sure cream cheese would make it more "dip-ee." 

So fun for my girls to help put together! One thing to note is that we followed the recipe exactly, but we felt like it was just too thick with the cake mix flavor. So we added almost another 2 C of cool whip and that made it perfect!


What you will need:
  • 1 box funfetti cake mix
  • 2 C cool whip
  • 2 C plain yogurt
Directions:
  • Mix all three ingredients together and use your favorites to dip!

Thursday, April 23, 2015

Chicken Strips

Have you ever been to Texas Roadhouse and wondered how they get their chicken strips to be all bumpy (or anywhere with bumpy chicken strips for that matter)? Cause I have. I love them! I've finally found a way using my trusty Pioneer Woman!


What you will need:
  • Chicken tenderloins (I think I made around 20 and the flour/buttermilk called for was still plenty for that amount)
  • Buttermilk ( 1 1/2 C to soak the tenders and another 1/2 C or so for later)
  • 1 1/2 C flour
  • 2 T spices of your choice (original calls for 2-3 tsp Lawry's Seasoning Salt. We're a little freaky about flavor so we dumped in Lawry's, a Butt Rub and some Creole)
  • Enough oil to fill about an inch in a large cast Iron skillet or fryer of your choice
Directions:
  • In a large bowl, soak the tenders in 1 1/2 C buttermilk for 20-25 minutes. It breaks down the chicken and makes 'em all nice and tendery
  • Meanwhile, in a 9x13" baking dish, dump 1 1/2 C flour and slowly drizzle in 1/2 C of buttermilk all around the flour while you do whisking motions with a fork. It will make some of the flour clumpy. You want it to be so that there's an even amount of dry flour and clumpy flour throughout the baking dish (IMPORTANT: You really want to use the 9x13" baking dish for this. I tried to use a bowl and it was much much harder!)
  • When the chicken tenders have soaked, start heating up your oil (you want it to around 375*)
  • Plop a few chicken tenders into the flour mixture and coat them. They will have clumps on them. You want this!
  • Place the chicken to the side like on a baking sheet or somewhere for them to sit while you're frying them up
  • Place a few at a time into the oil to fry each side (about 1 1/2 minutes per side)
  • Done!

Saturday, October 4, 2014

Mini Chocolate Chip Cookies

Helloooo General Conference weekend! I let out a little secret on my Instagram today. I gain more weight during General Conference than I do at Christmas! It's the combination of the need for comfort food in the fall and being snuggled up inside during the weekend. It's just the atmosphere! Christmas time I am usually busy playing and making sure things are going as planned (where IS that special stocking stuffer I got for so and so?! It was here yesterday!!! Sound familiar?) General Conference? I have nothing to do but cook, eat and relax.

One tradition that I make every year is my mama's Beef Stew & Rolls (click the link to get the recipe. So delish!) But this year I tested out something else! I have my own "perfect chocolate chip cookie recipe" that I created last year (which I have yet to share with anyone), but when I saw these tiny ones on Pinterest I absolutely had to make them. I HAD to! I don't trust myself to convert a typical choc. chip recipe into a mini one so I went with someone who knew, Jaclyn at Cooking Classy, and boy does she know! These are heavenly! And so much fun for the kids! And of course....sooooo cute. Jaclyn's are cuter than mine because I didn't have any cornstarch and made them anyway :( haha. So if you're wondering what kind of difference that 1tsp of cornstarch makes, just compare my pictures with hers and you'll understand. But, if you're not worried about looks and taste alone, they taste mighty excellent even without the cornstarch so have no fear!


What you will need:
  • 1/2 C butter
  • 1/2 C brown sugar
  • 1/4 C white sugar
  • 1 egg
  • 1 tsp. vanilla
  • 1 tsp. cornstarch
  • 1/8 tsp. + 1/4 tsp. baking soda
  • 1 1/3 C flour
  • 2/3 C chocolate chips
Directions:
  • Preheat oven to 350 degree's
  • Blend dry ingredients (flour, baking soda and cornstarch) into a small bowl and set aside
  • Cream together butter and sugars
  • Add in egg and mix well
  • Ad in vanilla and blend
  • Slowly add in dry ingredients until well combined
  • Add in chocolate chips and blend
  • Line a cookie sheet with parchment paper (I just lightly greased the cookie sheet)
  • Roll dough into heaping teaspoon sized balls
  • Lay balls out 1" apart on cookie sheet
  • Bake for 5-6 minutes until edges are slightly golden (they will look underdone)
  • Let them finish baking/cooling on the sheet for a few more minutes before transferring them to a cooling rack

Thursday, October 2, 2014

PREP YOUR SNACKS THE FAST, CHEAP AND EASY WAY!


With a baby on the way and two kids FULL of energy and constantly hitting a new growth spurt, I decided it was time to get a bit more organized with their snacking situation. I'd like to say it's because I'm really into healthy eating and such, but really I am just too big and too uncomfortable to go help them get a snack EVERY. TEN. MINUTES.

 I think I spend a good chunk of my days distracting them from snacking. Either they get bored so they think about snacks, or they are completely off the wall and burn so much energy they are literally starving. I found myself just being too tired to care and being like, "um, sure, if you can find a snack yourself you can have it." This resulted in them frequently finding little candies or a giant spoonful of Nutella :).

I thought about getting snacks prepped, but in my mind that meant I'd just be spending more money and more time on them. So I was really obsessed about making sure that this was something I could actually keep up with and not have it break my food budget each week. After putting all this together and seeing how long it would actually take each week, I was shocked. It did not take long at ALL. The grapes might have taken the longest, but I don't actually know that because my kids prepped them for me and it took them about 5 minutes tops, and the ENTIRE food prep process took approximately 15 minutes (not including the yogurt buttons, but those seriously go by super fast, too) So, as for doing it and making sure it wasn't costing me a fortune, let me break it all down for you on why I chose each thing I did :).

First of all, I found a cool app called "Fooducate." You can scan items at the grocery store and it will give you an overall health "grade" of said item. You can click "why" it was given that grade and also click "alternatives" with a list of options that have a better grade. You can search items and add items and AH, it's just amazing.

We also just got a Mandolin Slicer to make the chopping/slicing go faster. However, I didn't use it for any of this prep and like I already said, it went by so fast. I'll test it out with the mandolin and see how much faster it makes everything. But I'm all about finding ways that everyone can do things with what they already have :). Anyway, moving on.

FRIDGE SNACKS

I really tried to think about what my family truly likes, plus a few things they think are only "okay" to see if my tactic would help them reach for the healthies a bit more. I also got the actual SNACK size bags so I wouldn't feel like I needed to fill up a full sandwich bag for just a snack. I was also worried about the cost of using so many bags, but with the exception of the ham&cheese and strawberries, I don't mind just rinsing them out and reusing them.  I chose:

*Cucumbers
Not pictured, because they didn't have any at the store when I went. I'm checking back later so I can slice them up for my oldest, she's the cucumber queen!

*Apples
Also not pictured. I looked at many different ways to slice them without them turning brown, but most of them required to soak them in soda (and NOT rinse them before bagging them) or covering them in lemon juice. My kids like to eat an apple whole anyway, so they're just in the fruit drawer for them to pull out if they want instead of in a baggie and it's fine.

*Strawberries
Really I don't ever plan on actually saving money on strawberries. It will always feel like I'm spending a ton on those haha.

*Grapes
Grape bags always come with SO MANY GRAPES. It's hard to buy a bag/package and feel like you didn't waste your money because it's nearly impossible to eat them all before they get gross. Plucking them, washing them and bagging them makes them feel more manageable and less wasted!

*Mandarin Orange cups (not the healthiest way to go about this one but I already had them so why not)

*Carrots
I use to buy the little bags of mini carrots or pre chopped. I'm not sure why I ever did that. I got the bag of a bunch of whole carrots for a buck and peeled/cut them myself. It seriously took me about 3 minutes, if that. 

*Snap peas
This is one of those "only okay" veggies to my family. They'll rarely get eaten if the full bag is just sitting in the fridge. But stick 'em in a little snack portion baggie (or in my case, I made a few "blended" baggies with the carrots) and it's so much easier to get yourself to eat them

*Cheese sticks and ham
OKAY. So this is probably my favorite. At first I thought, duh I'll get string cheese and some lunch meat. And then I thought about how much money that actually is and I was like nope, never mind. Especially since the lunch meat in the packaged meats section is usually ....... not even meat :(. Haha! I decided to just use the cheese I already buy and cut them into sticks myself. I used FOUR SLICES of cheese is all (once slice per bag). And as for the meat, I like to get black forest ham from the deli for ham & swiss slider sandwiches and sandwiches throughout the week anyway. So I honestly just got a little extra for the snacking and it cost me about $1.50 more. That was worth it to me not be giving them crap meat and also have enough on hand for extra things.

*Celery/Peanut butter
I actually didn't do this. My kids hate celery. *I* hate celery, and my husband likes celery as a way to lick peanut butter. I spent about 2 bucks on a package of 50 mini plastic cups with lids so I could have the option of adding dips to things, but didn't use it for this! 

*Boiled eggs
I do plan on doing this, I just didn't think about it until after I was all done bagging everything and I felt like what I had was enough for the week. 

*Cherry tomatoes
This would be a great idea....if my husband and littlest (the only ones in the family that like tomatoes) liked cherry tomatoes. Picky, picky, ;) I figure when my 3 year old requests a tomato for a snack I can handle cutting one up for her, since it probably won't be super often.

One thing I was worried about is that all the fruits/ham/cheese would disappear before the veggies. So my rules is that the veggies have to be gone before we can refill any of the other snacks the next week.

CUPBOARD SNACKS

I purposely made this snack section smaller so they'd reach for the healthier items in the fridge more often (it works).  Clearly you could choose healthier options here.

*Fruit snacks
 The fruit snacks could be replaced with fruit leathers instead. But I honestly kind of hate those and I'm not going to pretend like it's worthy my money. They are the most sticky pieces of crap ever, despite how healthy they are. Sorry. Plus, with these being the most sugary treat out the box, I can use them as leverage; "you can have a snack from the fridge but if you want a fruit snack you'll need to put your clothes away first. " HA

*Granola bars
There are definitely healthier granola bars in this world, but almost all of them are secretly not even that healthy, and the ones that actually, truly ARE....you might as well eat some cardboard or dry oatmeal. So I opted for a kind that's tasty and on sale :). I got 10 of these for 2 bucks, vs. $5 for 4 of the "healthy" ones. Plus, these are macaroon style so......it would be hard to tell me to get any other kind :)

*Pretzels
Because kids like pretzels and they're about a million dollars cheaper than goldfish (I hate you, goldfish). 

*Graham Crackers/Nutella
So this is where those little cups came in. I got to control the portion of Nutella and you can come up with so many things to dip in it. (I considered putting a veggie dip in with the carrots in the fridge, but unless it was going to be ranch, making the whole thing unhealthy, it wasn't going to happen. Committing to making a hummus dip or something every week ....I just know myself, and that's not going to happen).

FREEZER SNACKS
Not a ton here, but this is what I've started with!

*Yogurt buttons
I know you've seen these on Pinterest everywhere. But I just knew that they'd probably melt so freakin' fast and make them not worth my time. But when my kids started living for GOGURTS every evening for dessert, I was desperate for a cheaper alternative. I made these up (so so SO fast to make) and stored them in the freezer. When my kids are ready for "dessert" (no joke, they call it dessert) I just dump a little handful into those mini cups with a spoon and they feel like the luckiest kids in the world. Plus they got to choose their own flavors. Basically, I can make about 50 "buttons" with one cheap yogurt vs. dropping money on gogurts that are unnecessarily expensive. My only advice is to try and get yogurt that doesn't have chunks of fruit in them. It makes it difficult to squeeze out of the bag when you're making the dots :).

*Banana Peanut Butter Ice Cream
I made this a long time ago and it was really good. I decided to make it again and couldn't believe I don't make it regularly! It is literally bananas and peanut butter. That's it.  (2 frozen bananas sliced and 2 T peanut butter.) When you first make it, it's a really really thick shake texture (which is great, and can pass for an ice cream), but I put mine in the freezer so it can turn into REAL creamy, delicious ice cream.Clearly  my husband loves it since he stole some before I could get to it for a picture!

Tuesday, December 10, 2013

Sugar Cookies

Happy Holidays!! I won't be around for the next few weeks. We're MOVING! And visiting family and celebrating and all things nice and Christmas-ee. Yesterday I had the urge to bake cookies in the middle of all the packed up boxes taking over the place. I had to rummage through a few of those boxes to find what I needed but it was totally worth it. My daughter walked in from school to see the first batch of cookies cooled and ready to decorate and she was just so excited! About the same time my other daughter woke up from her nap so they were both in heaven with these.

This recipe makes around 50 cookies or so. I burned an entire batch of some cute bells, though :(Quick tip here: If you check the cookies after the timer goes off and you decide to let them brown a tad more, don't forget that you decided to do that :). The flavor of them are really good, too. A lot of sugar cookies end up just tasting like bland dough. But this has a nice buttery sugary cookie-ee flavor. I really wanted to make some cookies and use sour cream, but I didn't have any, so you'll have to deal with this instead, even though I didn't really miss it in there!

Sorry about the frosting. I don't know the recipe. I threw it together until it tasted and felt right. I used a blend of almond and vanilla, though. It was gooooOOOOoood. And it had a GREAT texture. Creamy and smooth, but still glossy and firmed up just enough so that it wouldn't get all over the place when you stack the cookies. Perfect if you ask me.


What you will need:

  • 3 sticks of unsalted butter
  • 2 C sugar
  • 1 tsp. vanilla
  • 4 eggs
  • 2 tsp. baking soda
  • 1 tsp. salt
  • 4 C flour + 1 C flour for rolling out (any time I make sugar cookies, I cut the original flour call by 1 C because I don't want them to end up dry or tough after adding in more flour to roll them out. I want to be able to use as much as I need without worrying. So this is how much I ended up using for both mixing and flouring later)
Directions:
  • Cream butter and sugar together
  • Add in vanilla and eggs
  • Add in baking soda and salt
  • Add in flour one cup at a time
  • Mold dough into a ball and flatten it down into a thick disc shape
  • Lay it on some greased plastic wrap and wrap it up
  • Chill in the fridge for an hour or more
  • Preheat oven to 400 degrees
  • Flour your dough surface
  • Roll out your dough to about 1/2" thick (I found that the 1/4" thick cookies ended up a little more crispy than I liked and the 1/2" ones stayed softer, so if you like them a little crunchier, make them thinner)
  • Cut them into shapes and lay them on a baking sheet (I put down some parchment paper, but you don't have to)
  • Bake for 6 minutes and check them. If they are just baarely starting to brown on the edges, take them out. 

Sunday, November 24, 2013

Grasshopper Frozen Dessert

I made this for my daughter's 3rd birthday! It was really yummy. I mean it's basically just mint & chocolate chip ice cream, so of course it was good. But sometimes you just need that extra oomph to your desserts!

One thing I would note is that I'd try and make this the day before serving. I made mine the day of and the oreo's were still crumbly. The next day they were the perfect ice cream-crust texture!


What you will need:
  • 1 pkg. Oreo cookies
  • 1 1/2 cartons Mint & Chocolate Chip ice cream
  • 1 8 oz. carton Cool Whip, softened
  • 9x13 pan
Directions:
  • Allow ice cream to soften up. I waited until I was able to press a spoon into it and it was really soft on the top and still pretty firm down in the middle
  • Separate the cream from the cookies in the Oreo's
  • Add Oreo's into a larg Ziploc bag and smash the heck out of them (or use your food processor, which I didn't do and wished I had ha!)
  • Press Oreo's evenly into the bottom of your 9x13" pan
  • Scoop large amounts of the ice cream and plop them all down onto the Oreo's crumbles (don't spread it until all the ice cream is "plopped down" first)
  • Once all the ice cream is there, start spreading. It will take a bit of work. The best way I can describe the method that worked really well for me is a short and quick "sawing motion" with my large spoon. I'd spread some, then do the sawing motions, spread some, do the sawing motions. But do whatever works for you!
  • Spread Cool Whip on the top of the Ice Cream and add sprinkles, chocolate shavings or whatever your heart desires
  • Cover and freeze!
  • Pull out about 20 minutes before serving to soften a little!